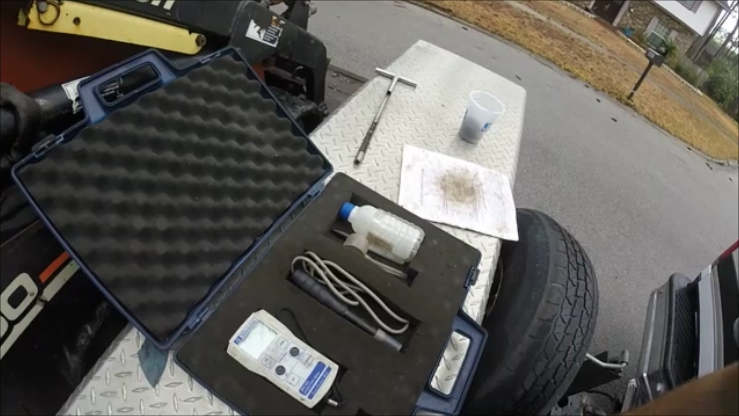
Soil pH Testing
Plants as well as sod generally require around 14 mineral nutrients for proper growth and reproduction. For the most part, the existing soil can typically supply sufficient amounts of these nutrients. However, in some cases, soils may be lacking of one or more of these essential nutrients that sustain healthy growth. Soil pH testing is the most effective way to determine the nutrient status as well as the pH of the soil in a home landscape or vegetable garden. The soil test results are useful to determine whether fertilizer, lime or sulfur applications are needed. This page provides information which will help guide you in taking a soil sample and how to understand the results of the soil test.
Taking a Soil Sample
In order to obtain reliable results from a soil test, the soil sample must be taken correctly. The soil sample should accurately account for the entire area that will be planted and maintained. The items needed to take a soil sample include a plastic bucket, a shovel (or soil probe), and a paper bag or newspaper. Follow these steps to properly collect a soil sample:
- Identify the area that is in question and collect multiple samples in this area. Turf areas, vegitable gardens and ornamental beds should all be sampled separately. Also, any problem areas such as depressions, rocky areas, sandy areas or areas under and around large trees should be sampled separately to avoid contaminating samples from good areas.
- Using a shovel (or soil probe), remove soil from 10 to 15 locations within the sampling area. Soil should be removed from the top 6 inches. Walk in a zigzag pattern, stopping occasionally to remove soil for the sample.
- After taking each sample, remove any plant material or mulch and deposit the soil into the plastic bucket. Mix the soil in the bucket to ensure it is well blended.
- Spread the soil out on a newspaper or paper grocery bag and allow it to dry thoroughly.
- Once dry, pack approximately 1 pint of soil (fill to the dotted line) into a soil sample bag (available free from your county extension office). Alternatively, you may pack soil into a zip-top plastic bag.
Soil Test Results
Once the soil analysis is complete, a soil test report will be mailed to you (usually within 7 days after the ESTL receives the sample). For a quicker response, provide an email address and the report(s) will be sent immediately upon completion of the analysis. A copy of the soil test report will also be sent to your local county extension agent, who you may contact if you have further questions or need assistance interpreting the results. Figures 1-3 show an example of a soil test report from the ESTL.
Enhancing your lawns ultimate beauty and success begins with the steps taken before the sod arrives.
In oder to be successful, sod needs sunlight, air, water and nutrients. Simply put, if it is lacking any one of these variables, the sod will suffer. In in some cases, the soil may already be lose and the grass will flourish, however, most of the time the soil in your yard has become extrememly compact over time. By tilling the soil, air and nutrients are reintroduced into parts of the soil where they may have been lacking. This will allow for rapid new root growth, as long as you can provide the water and sunlight!
Watch the video below to see how we conduct our soil tests
Frequently Asked Questions
Is my soil up to par?
Click here for a Soil Test for about $10.00. This test should give you an idea of the pH of your soil.
What is the best soil for sod?
Loams (a mix of sand, silt and a small portion of clay) and sandy loams with a pH ranging from 6.0 to 7.0
Can you improve the nutrient concentration in my soil?
If your soil test results indicate that the pH of your soil is leaning towards the acidic or basic side, we can add lime or sulfer to neutralize the soil. Otherwise, the sod that is installed is typically raised in the same soil that your lawn is comprised of in Jacksonville Florida. Call now for your free estimate.


